How to create ebooks with Pages on Mac
Creating an excellent ebook on your Mac — without being locked into sharing it only through the iBooks Store – is now almost as simple as exporting a file. Apple's latest version of Pages adds robust support for EPUB3 files, letting you turn nearly any document into an ebook ready to sell via iBooks, quickly convert for Kindle, or just share with friends, family, or classmates. Here's a step-by-step guide to making an ebook of your own.
Before you begin: Fixed or reflowable?
What kind of book do you want to publish? For text-heavy books like short stories or novels, use a reflowable template, which changes each book's layout and page count to accommodate the screen size of the device on which it's being read.
Reflowable templates can include images, as long as they're inline with the rest of the text. But if you want to incorporate lots of images, and preserve your page layouts on any device, use a fixed template instead.
Create a reflowable ebook
Choose your template
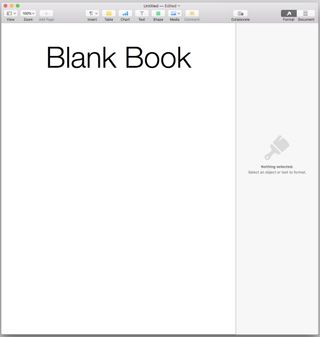
Pages includes four reflowable templates: Blank Book, Basic, Textbook, and Novel.

The latter three are worth exploring to get formatting ideas, but Blank Book is a good place to start.
Paste in and style your text
Since Pages can automatically update the font, size, and other attributes of any style throughout the entire document, you'll save time and trouble if you apply Pages' default styles to your text up front, rather than picking your way through the entire manuscript later to apply those changes piecemeal.
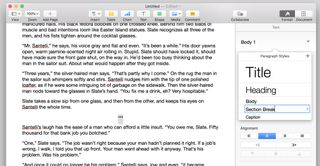
Select all in the Blank Book template and delete it. Then paste in your desired text. Go through the text and apply the correct styles to each part of the text.. If you're pasting in text that already has fonts or styles applied to it, consider selecting all again, then changing the style from Default to Body. That'll make it easier to adjust its look and size later.
Master your iPhone in minutes
iMore offers spot-on advice and guidance from our team of experts, with decades of Apple device experience to lean on. Learn more with iMore!
Note that you're not quite seeing here what you'll see in your finished ebook. For reflowable templates, Pages sets its document size to the equivalent of 1024x768 pixels — the minimum screen resolution of older iPads, and the resolution of many Kindle models.
But Macs and iOS devices with different-sized Retina screens may display text differently. Using the Body style for your body text helps here; its 16pt size hits the sweet spot for legibility on a variety of screen sizes.
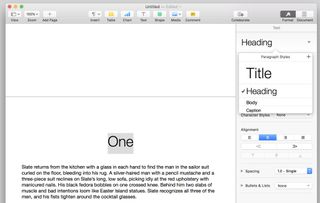
Use the Title style for, you guessed it, the title of your work, and the Heading style for chapter headings.
Pages will automatically create page breaks before any style you include in your Table of Contents — more on that later. But for clarity's sake, you might still want to create your own page breaks by selecting Insert > Page Break.
If you need more styles — for subheads or chapter numbers, for instance — format the Body text with your desired size and alignment, then click the + sign at the upper right corner of the Paragraph Styles list to create and name the new style.
Add fonts and formatting
Many ebooks just use whatever font the reading app or the user set. But if you want a more distinctive look, EPUBs support embedded fonts. This ensures that your chosen fonts will show up correctly, even if your readers don't have them installed on their device.
Before you use a font in your ebook, make sure you have the right to do so. Some fonts are licensed for use in ebooks, but others aren't. Any fonts that came with your Mac should be fine. Check the licenses for any additional fonts you've purchased. Google Fonts and The League of Movable Type offer high-quality free fonts under completely open-source licenses, and FontSquirrel lets you sort its free offerings to find fonts with ebook-friendly licenses. If you install new fonts, quit Pages before you install them to ensure they'll be available when you reopen the app.
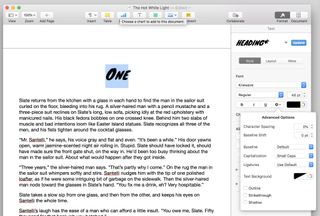
To change fonts and other attributes, select one instance of the type you want to change — a single chapter heading, a paragraph of body text, etc. Then use the Inspector pane to adjust it. Font, size, alignment, and weight are easy enough to find, under the Style tab. Text transformations like all caps, small caps, and character spacing are hiding there, too, under the gear icon.
Note that in my tests, I couldn't get horizontal rules from my Pages file to show up in the resulting ebook. I also had trouble getting the ebook to recognize extra space I added beneath the Heading class.
Once you've made the desired changes, a blue Update button will appear next to the style's name. Click it, and those changes will take place in every instance of the style throughout your document. You can tinker with styles like this as much as you like, until you're happy with the results.
Pictures: Worth (approximately) 1,000 words
Reflowable ebooks do support images — everything from full-color photos to graphic ornaments that mark section breaks — but only if they're inline with the text. That means you can't wrap text around images;
Drag your image into the Pages file. In the Inspector Pane, you'll see three tabs: Style, Image, and Arrange.
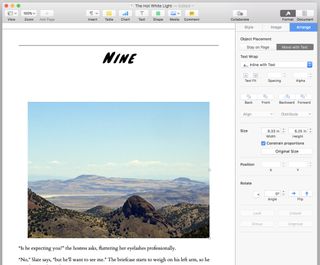
Make the Arrange tab your first stop. Select Move with Text, and then under the Text Wrap options, Inline With Text. If your image's placement still seems funky after that, try selecting it, cutting it, and then pasting it back into the desired spot in your text. You can adjust the image's alignment by selecting it the same way you would any block of text.
A few extra goodies, should you need them: Under the Image tab, you can adjust an image's exposure and saturation, or automatically enhance it. And the Style tab can add drop shadows or borders to an image via presets or manual adjustments.
Create your table of contents
Put your cursor where you want the table of contents to go — I recommend the top of the first page of the beginning of the book, after the title page and any front matter — and select Insert > Table of Contents > Document. Pages will automatically create a page break after the Table of Contents it creates.
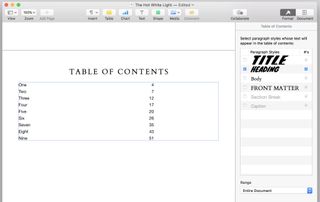
By default, the Table of Contents is based on instances of the Title style. You can change that in the Inspector pane under the Table of Contents tab. Select the style or styles you want the table to include, and the table will automatically reformat. The page numbers you see in Pages won't appear in your final ebook, but each item in the table will be linked to its corresponding place in the text.
Pages will create another page break before any instance of a style you include in the Table of Contents. So if you're including more than one style in its listings, make sure those styles don't all show up on the same page at any point, lest you get big, awkward, unintended gaps in your text.
You can select the text in the table to change its font, size, and other properties. And you can add other text and items to the same page as the table — such as a helpful "table of contents" label above it.
Cover up
When you export, you'll have three options for a cover for your ebook:
- Have no cover, and get a generic cover with the title and author name on it.
- Make the first page of your ebook the cover. As I mentioned, Pages' Novel template includes a cover image you can modify. But the template's page size is smaller than the recommended cover sizes for the iBooks store (1600x2400 pixels) or the Kindle store (1563x2500 pixels), so if you want to sell your book, your cover may not be quite the right size or quality.
- Include an image of your choice as the cover.
I'm a fan of option 3. But depending on how you intend to use the book — sharing with friends and family vs. selling it commercially — there's no shame in using options 1 or 2 if you don't have image editing software or graphic design chops.
If you lack those tools, but still want a slick cover, a quick Google search will reveal a variety of online tools and templates to help.
Export your book
Got everything formatted to your heart's desire? Go to File > Export To > EPUB....
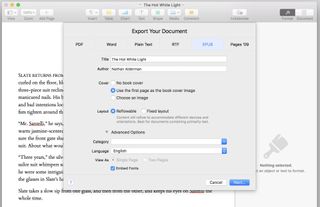
Fill in or correct the Title and Author fields. Choose your cover option. You can leave the Layout buttons and the Embed Fonts checkbox alone. Use the Category pulldown to select a preset category for your book, or type in one of your own.
When you're done, click Next… to name your file and choose where to save it.
Get familiar with this dialog box. Since Pages can't preview an ebook before it's exported, you'll likely see it over and over and over as you tweak, test, and re-export your book until it's just right.
Create a fixed-layout book
Since the basics of this process resemble those for a reflowable book, we'll focus here on a few key differences.
Quash your Kindle hopes
While flowable EPUBs will convert to Kindle files with nary a hitch, my tests converting landscape-format fixed-layout EPUBs to Kindle were disastrous. The conversion hacked a vertical rectangle-sized window out of the center of each page, displayed that — occasionally poorly and with absent formatting — and nothing else.
Switching the orientation from landscape to portrait didn't help. Pages still appeared slightly off-center and cropped, and text blocks showed up as solid black squares.
In general, I would advise you to stick with reflowable books if you aim to convert them to Kindle files.
Go with the flow
Remember the rule in reflowable templates about all images needing to be inline? Yeah, that doesn't apply here. Feel free to wrap text around as many objects, in as many ways, as your heart desires.
Meet the master pages
Pages offers six templates for fixed-layout books, and unlike the reflowable ones, your choice of template matters more here.
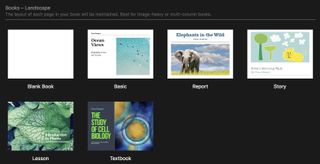
Each template comes with predesigned master pages that you can use when adding new pages to the book.
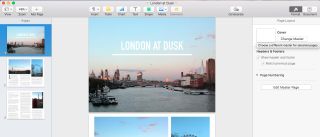
To add a new page in fixed-layout templates, click the New Page button, bearing a "+" symbol, in the upper left corner of the Pages window. You'll then select from the list of master pages, or pick a blank page. You can create your own master pages from a blank page, or make every new page blank and wing it as you go, but going through each template to check out its master pages and see which one might work best for your project could be worth your time.
To edit master pages, select a page from the thumbnails at the left of the Pages window, then click Edit Master Page in the Inspector pane at right. From there, you can move or change elements on any master page.
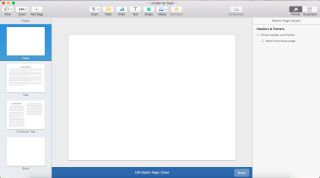
To add to a project's Master Pages, click the "Add Page" button, pick a new name for the type of page, design it as you please with dummy text, and then click the blue Done button at the bottom of the window.
Thread your text
To have your text flow naturally through your document, use Pages' ability to thread text boxes. Once you create a text box, you'll see a small circle at the top of it:
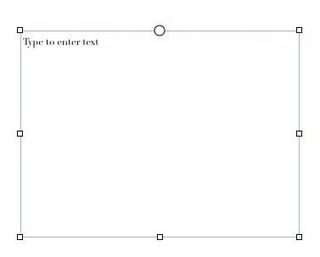
Click that circle, and the text box will begin or continue a thread that connects multiple text boxes.
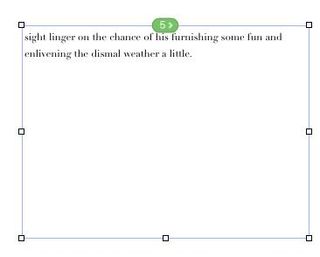
Paste a long chunk of text into the first box, and it will flow and automatically reflow through all subsequent boxes. Pages can detect where each text box is relative to the others, and add it to the thread in the appropriate position. If you create a text box atop another text box – for instance, to create a pull quote around which to wrap your main text – Pages knows to leave it out of the thread.
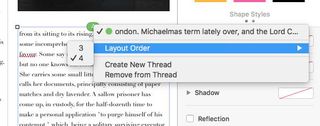
To change a box's position in the thread, remove it from the thread, or start an entirely new thread (Pages uses color-coding to help you distinguish between them), just click the numbered thread indicator at the top of the text box.
Export like an expert
Exporting to EPUB works the same here as with reflowable documents. The only difference: "Fixed layout," not "reflowable," is selected. If you're using a template from one type, you can't switch to the other when you export.
EPUBs don't get much easier than this
This new update makes Pages the easiest way I've yet found to turn out high-quality ebooks on your Mac. Even if you don't regularly use Pages, you may want to give it a try just for this feature.
Got any essential tips or tricks for making EPUBs in Pages that I haven't mentioned? Feel free to lay them out in the comments below.

Nathan Alderman is an iMore contributor. He’s been using Apple computers since his first Apple IIe in 1985, and writing professionally about Macs and their software since 2005. During his 12 years freelancing for Macworld, he covered email clients, web browsers, web design programs, writing apps, and games, and he’s continued to follow those interests at iMore since 2017. An editor and writing coach in his full-time career, he spends his dwindling spare time writing fiction for fun, volunteering for democracy, and contributing to podcasts on The Incomparable Network. Nathan adores his wife and wrangles his alarmingly large children in bucolic Crozet, VA.
Most Popular


