
Lithium-ion batteries do not last forever. As iPhones age, declines in battery life can cause unexpected shutdowns or render your device too slow to function. While Apple now has a number of ways you can address this problem including a new Battery Health section in Settings, if your battery has dropped below peak capacity it's time to consider a replacement. There are a few different options before you consider a DIY repair, so read below!
- How to replace a broken iPhone 6 battery
- Required tools and parts
- Remove the Screen
- Disconnect the cables
- Replace the battery
- Put it all back together
Make an appointment with Apple

Apple's $29 battery replacement program is simple and inexpensive for iPhone 6 owners — assuming you have the time for an Apple store or Apple Authorized Service Representative visit and they have the part in stock. (Stores have reported a 2-3 month wait for certain battery replacements, including iPhone 6 models.)
Repair the battery yourself

You can pull off the iPhone 6 battery yourself using our handy DIY guide. So if Apple doesn't have your iPhone battery in stock, don't fret.
Before you consider a repair...
Always make sure to back up your phone before any repair.
General repair guidelines
- Find a work area with bright lighting - iPhone components are small and you'll want plenty of light.
- Keep a clean, organized workspace so you don't lose or confuse any components.
- Group your screws so you can keep track of where they came from. Most screws are not interchangeable.
- Apply enough heat to loosen adhesive but not enough to damage the device.
- At any point during a repair, if the adhesive becomes hard to separate, apply more heat.
- After separating adhesive, keep the housing and screen in close proximity until flex cable is disconnected.
How to replace a broken iPhone 6 battery
The iPhone 6 battery is difficult to remove and replace: Several flex cables can be torn easily, so proceed carefully.
Required tools and parts
Obviously, you need a replacement battery, but you're going to need some tools as well if you're going to do this right.
While not required to repair your iPhone, we also recommend you use a magnetic mat and screw capsules to keep everything organized. iPhones are full of tiny screws; mats and screw capsules will help you keep them on your table and not lost on the floor.
Remove the Screen
- Unscrew the two pentalobe screws on either side of the lightning dock on the bottom edge of the iPhone 6.
- Use the metal spudger to slowly and carefully separate the glass screen of the iPhone from the body. Start on the bottom edge of the device and proceed slowly. The flex cable for the screen is at the top.
- Slowly pull the top of the screen away from the body and locate the EMI (electromagnetic interference) shield located by the bottom right of the battery.

- Unscrew the two screws securing the EMI shield to the logic board and remove it.

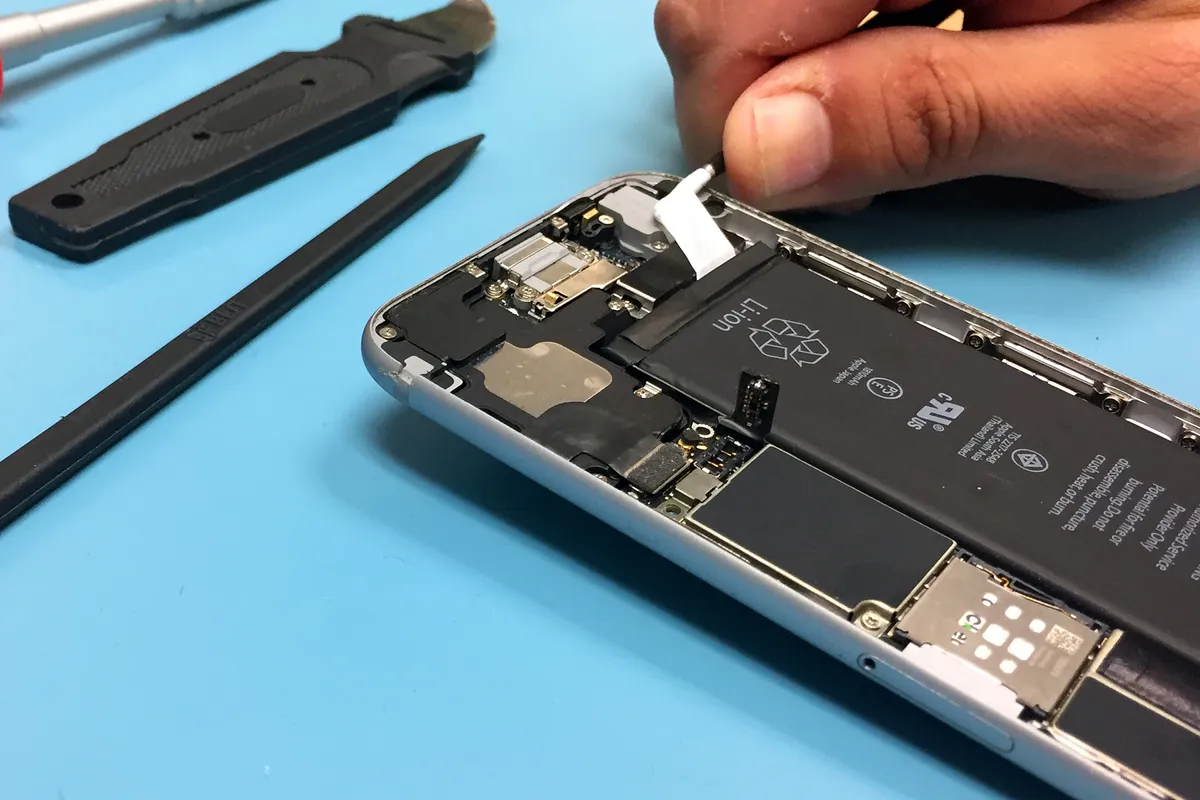
- Using a spudger, disconnect the battery cable from the logic board.

- Start removing the screen from the logic board. The screen's flex cable connectors are held onto the logic board with a metal shield plate. This plate has 5 Phillips screws that must be removed to be able to disconnect the flex cables from the logic board with a plastic spudger. Make sure you remove these screws and mark where they go. Incorrect placement will cause long screw damage to the logic board.
Replace the Battery
Two strips of white adhesive underneath the battery hold it in place. The best way to remove the battery is to roll and pull these strips out with tweezers.
- Position your tweezer tip under the black adhesive at the bottom of the battery as shown.

- Press the tweezer tip about halfway across the bottom of the battery.

- Now roll your tweezers, pulling the white adhesive out from under the battery. Simultaneously pull the tweezers away from the phone.
- There is another strip of adhesive under the battery on the iPhone 6. Use the same technique to roll and pull the other strip of adhesive.
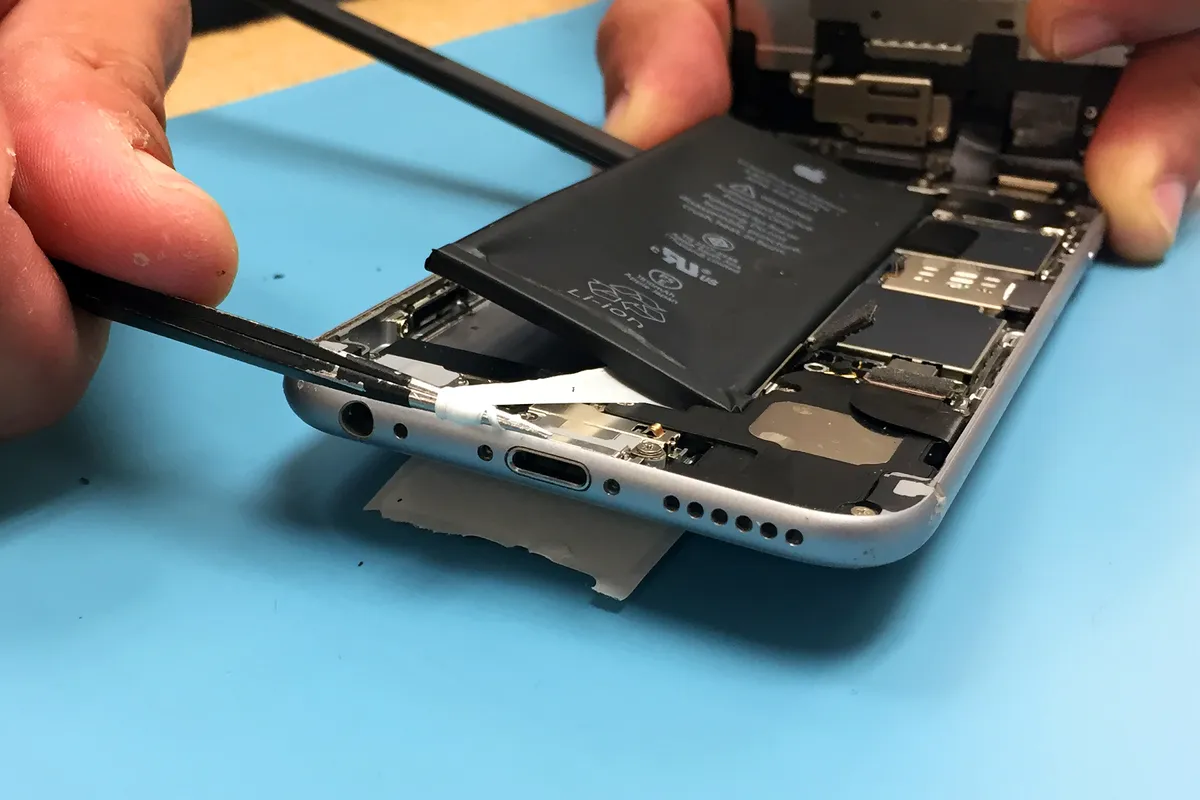
- Use a plastic spudger to gently pry the battery away from the base. If you pry from the logic board side, do not use the logic board for leverage as you might damage it.

- With adhesive tape, affix the replacement battery into place with gentle pressure.

Put the components back together
- Reconnect the front-facing camera flex, LCD cable, digitizer cable and home button flex cable to the logic board.
- Screw in the display cable EMI shield using four Philips head screws.
- Reconnect the battery connector. Use your plastic spudger to put it in place then press gently down with your finger to connect, distributing the pressure evenly to not damage the flex connector.
- Screw in the battery connector EMI shield with two Phillips head screws. The larger screw goes in closest to the battery.
- Fold the screen over the body. Insert the top of the screen into the frame first. Proceed carefully, it will click back into place but don't press too hard on the glass.

- Screw in the two pentalobe screws that go on either side of the lightning port.

Run into trouble?
If you have any other questions about swapping out your iPhone 6's battery, or if you find this iPhone 6 repair too complicated to attempt on your own, check out iMore's repair partner iFixYouri online at www.ifixyouri.com or at 888-494-4349.
○ Fix a broken iPhone 7 or 7 Plus
○ Fix a broken iPhone 6s or 6s Plus
○ Fix a broken iPhone SE
○ Fix a broken iPhone 6 or 6 Plus
○ Fix a broken iPhone 5c
○ Fix a broken iPhone 5s
○ Fix a broken iPhone 5
○ Fix a broken iPhone 4s
○ Fix a broken iPhone 4 (GSM)
○ Fix a broken iPhone 4 (CDMA)
○ Fix a broken iPhone 3GS or 3G


